
Navigate
Products
Download
eShop
Upgrade
Overview
Training
Support

Navigate
Products
Download
eShop
Upgrade
About
Training
Support
This tutorial explains how to print templates of multiple designs on a single sheet of paper (or vellum).
1 - Run Embird; it will start in "Manager" mode.
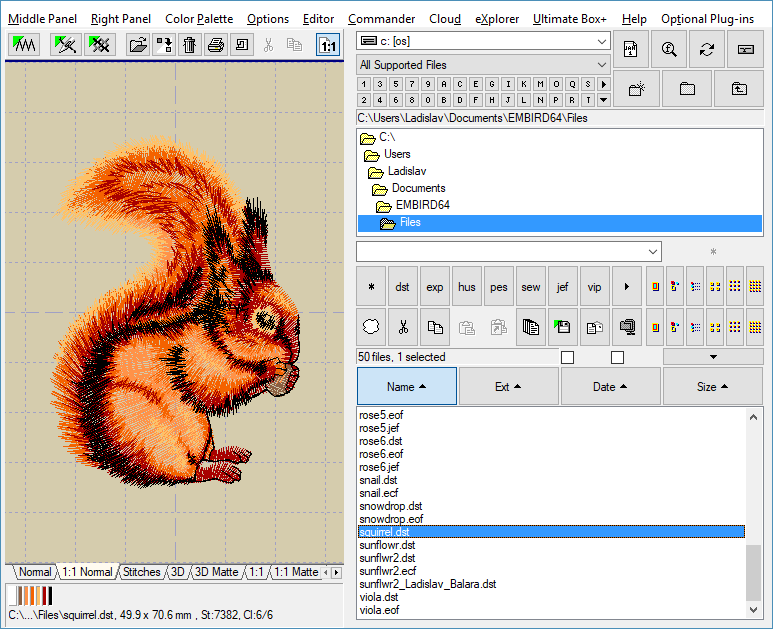
2 - In the "Files:" box at the right side of the screen, select the first design that you want to print out. To select a design, move the mouse pointer to its file name and click the left mouse button. Select only one design at this time; in this example, it is SQUIRREL.DST. You can double-click its file name to view the design in the preview area (Picture No. 1).
1. Select single design
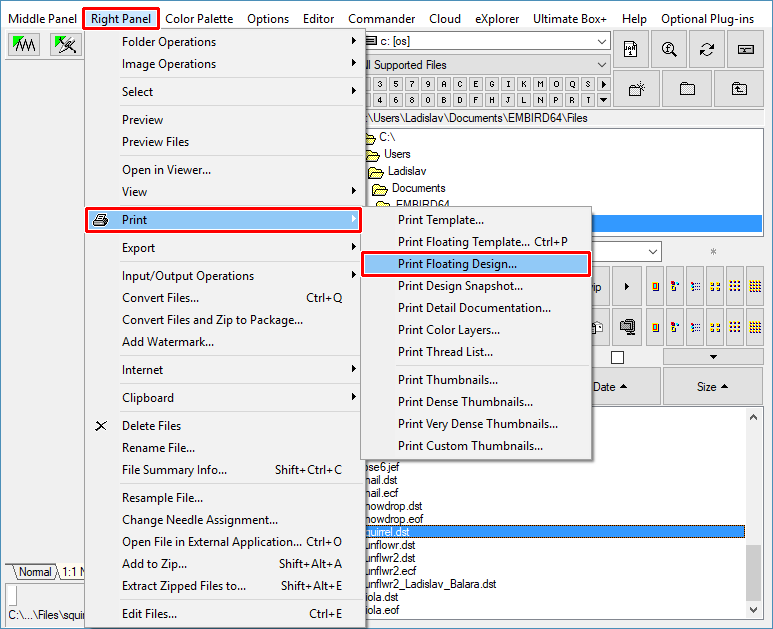
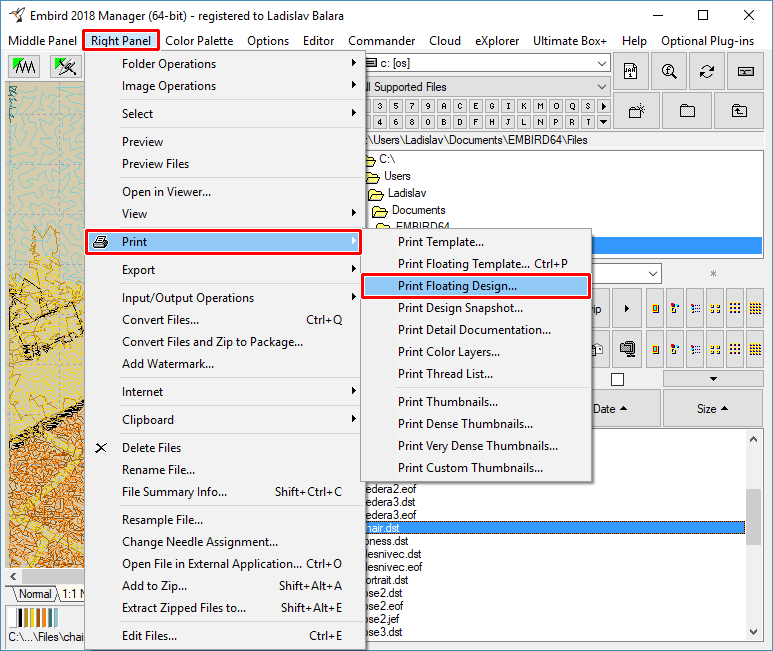
3 - Select the "Right Panel > Print > Print Floating Design" command from the main menu (Picture No. 2).
2. Select "Right Panel > Print > Print Floating Design" menu
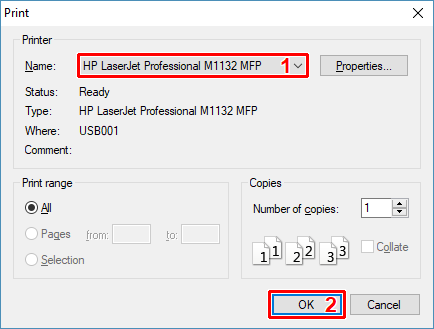
4 - A dialog box will appear on the screen, allowing you to choose the printer (Picture No. 3). Click the "OK" button to continue.
3. Choose printer
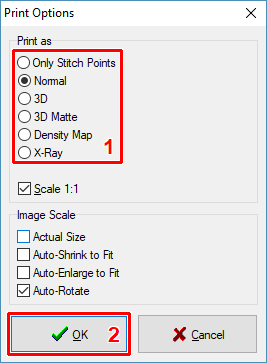
5 - Optionally, change the printing parameters (Picture No. 4).
4. Print options
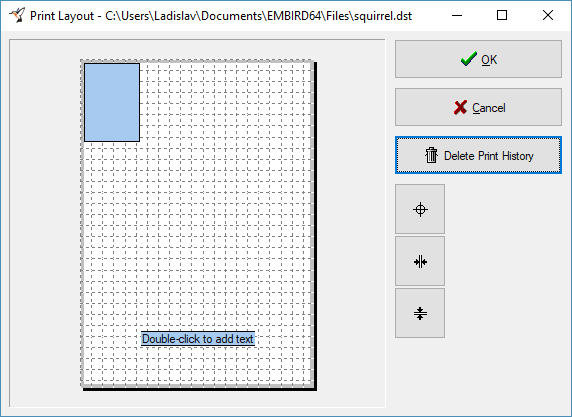
6 - The "Print Layout" dialog box will appear on the screen. There are two cyan rectangles placed on the paper; the first one shows the position of the design image and the second one is an optional comment, which you can specify after double-clicking anywhere in the layout area. You can move both rectangles by moving the mouse pointer over their area, depressing the left mouse button, and moving the mouse pointer while holding down the left mouse button. After moving the rectangle to its new position, release the left mouse button. In this example, we have moved the "design image" box to the top-left corner of the paper (Picture No. 5).
5. Print layout
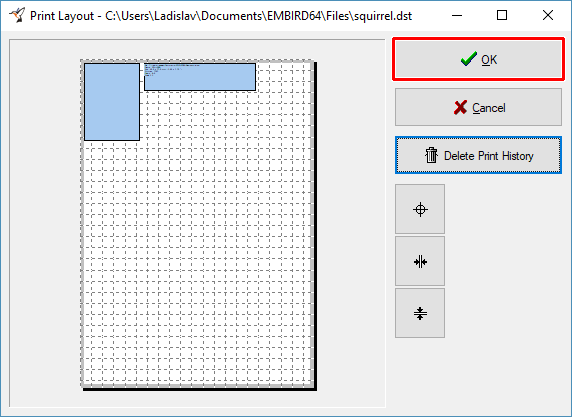
7 - Double-click the layout area to add the optional comment. In this example, we have moved the box with the comment to the top of the paper, close to the design image (Picture No. 6).
8 - Click the "OK" button to print out the template of the first design (Picture No. 6).
6. Print first design
9 - Insert the printed paper (vellum) back into the printer; we will print another template of the second design on this paper.
10 - Select the second design in the "Files:" box at the right side of the screen (Picture No. 7). In this example, it is the CHAIR.DST design. You can double-click its file name to view the design in the preview area.
11 - Select the "Right Panel > Print > Print Floating Design" command from the main menu again (Picture No. 7).
7. Select "Right Panel > Print > Print Floating Design" menu again
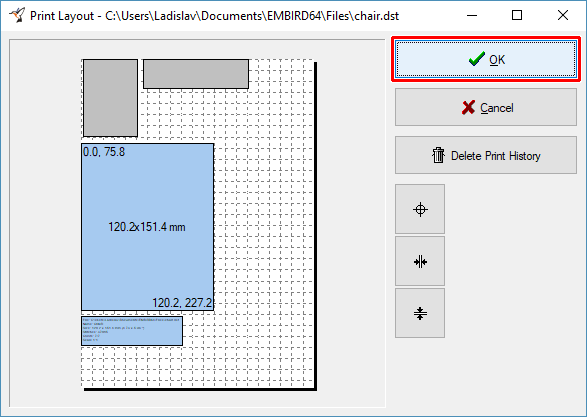
12 - The "Print Layout" dialog box will appear on the screen again. Again, there are two cyan rectangles showing the position of the design image and optional comment, but now there are also two gray rectangles showing the position of previous print-outs (Picture No. 8). This is very useful, because now you can position the rectangles in such a way that they do not cover the parts of the paper (vellum) that are already used.
13 - Click the "OK" button to print out the template of the second design (Picture No. 8).
8. Print second design
Tip 1: Click the "Delete Print History" button if you want to clear the gray rectangles. This is helpful in case you are printing on new paper, and the print history is not related to this paper.
Tip 2: You can print multiple templates on a single sheet of paper also in Editor and Cross Stitch Plug-in; just open a single file via the "File > Open" command and use the "File > Print Template without Texts" command. See also the Print Template tutorial.
Back to Embird Tutorial Contents
Developed by BALARAD, s.r.o. company since 1997