Navigate
Products
Download
eShop
Upgrade
Overview
Training
Support
Navigate
Products
Download
eShop
Upgrade
About
Training
Support
This tutorial demonstrates the use of trace tool to produce machine embroidery design from a raster image. For good results, image must be sufficiently clean. Input image can be in any file format supported by Studio. The most important factor is that edges of color areas are smooth, i.e. not jagged, which may be result of enlarging raster image.
1. Import image. Do not scale image to fit into the hoop, because if image is enlarged, it becomes more pixelated and the auto-tracing will not work well. It is recommended to resize the finished vector design, instead. In contrast to rasters, resizing of vectors does not affect the quality.

2. Let's start to digitize the Smiley design. Large filled areas should be digitized first. Select the Trace tool (the magic wand icon) from the tool bat at the left side of the screen with right mouse button. Then select the Fill style.

3. Studio switches to trace mode. We are going to trace the large yellow area. The panel at the right side of the screen contains trace controls and selection options. As this is fairly simple object, set Simplicity to 10 to achieve lower number of nodes.
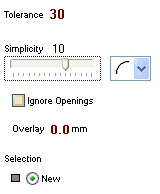
Each filled area with outline or neighboring area of other color should have some overlay to compensate gaps between the areas of different colors and also pull effect of the fabric. However, the yellow area of Smiley is somewhat specific because of the thin black lines on the eyes and mouth. While leaving holes for main parts of eyes and mouth, we will not leave holes under all thin black lines, because it would split the yellow circle into too many regions and complicate the sewing. Moreover, overlay would completely cover the holes under the thin lines anyway. Therefore, we will leave Overlay=0 for now.
Selection is set to New. As we are going to select just one area now (yellow), it doesn't matter whether Selection is set to New or Add. Color Tolerance for selection is default 30.
4. Click anywhere on the yellow area. Selection is indicated by flashing dots.
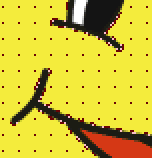
Click Apply button on the button bar at top of the screen to convert selected raster object into vector objects. 5 vector objects are created: main fill and 4 holes.
If Ignore Openings option is checked, program would create just the main fill. This option is useful for creation of overall filled area when small holes are not wanted or the fill is used as an overall underlay. Anyway, this is not our case, so this option is unchecked.
5. Parts Object Inspector (the one beneath the main Object Inspector) contains list of the 5 new vector objects.
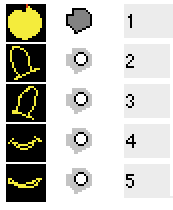
Because of reasons mentioned above, we will eliminate some holes that are too thin. Select object no. 5 (the hole under the chin) and simply delete it. The holes under eyes and mouth are more complicated because they contain both thin and thick parts. We want to preserve thick parts and erase the thin ones.
6. Select mouth hole in Parts Object Inspector and use right mouse button click on the selected object to open a pop-up menu. Select Edit from the pop-up menu to switch into editing mode.
It is necessary to use Parts Object Inspector to select mouth objects, because openings (holes) cannot be selected directly in the work area.
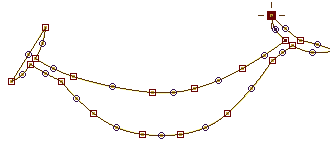
7. Delete nodes on the thin parts of the mouth to simplify the object. Select respective nodes one-by-one and hit DELETE button on your keyboard for each of them.
You can also select multiple nodes at once by holding SHIFT key depressed and dragging selection box around the nodes.
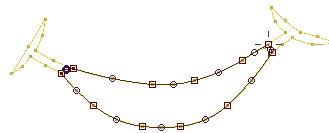
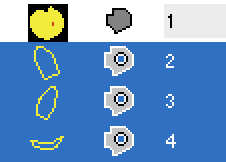
Repeat steps 6 and 7 for eyes. When finished, all three holes should contain only the thick parts and all thin parts should be deleted.
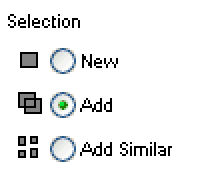
8. Now trace all gray and white areas on the hat. Use the trace tool as in step 2 with few changes: set Overlay to 0.3 mm (for example) and Selection options to Add. Then select one-by-one all three gray areas and three white areas on the hat by clicking on them.
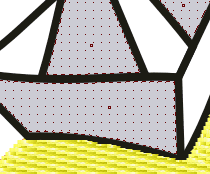
It doesn't matter that selected areas are of different colors because Auto Color options is set on. Therefore, each vector object will get proper color from the underlying raster.
If you happen to select wrong area, use Undo/Redo commands from the main menu > Edit or CTRL+Z/CTRL+Y shortcuts.
9. Use Apply button or Generate Stitches button to convert selected objects to vector objects.
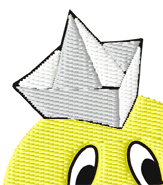
All 6 new objects are simple objects and do not need any editing unless you want to change the stitches direction or pattern. In such case, use the Parameters window to set new parameters to the vector objects.
Notice overlay on all 6 objects that covers part of the black outline. It will help to embroider design without gaps between respective objects.
10. Next step is to trace the white and red areas on eyes and mouth. We have intentionally omitted white area on eyes in step 8, because they will look better as columns than fills. Click with right mouse button on the Trace tool icon. Then select the Column style

11. Select white areas on eyes and mouth. Then select also the red area on the mouth.
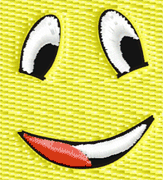
Use the Add selection option all the time to add respective areas to selection. Click Generate Stitches button to create vector objects and to fill them with stitches.
Notice that new objects are columns and they also have an overlay.
12. Trace all black outlines at once.
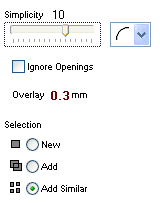
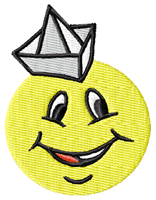
Select Add Similar selection option to allow program select all areas of the same (similar) color at once. Then click anywhere on the black outline in the work area. Click Generate Stitches button to create vector objects. As the column style was selected in step 10, new objects are all of the column style. Actually, they are fill objects with Autocolumn option set on.
Thin outlines expanded with overlay may need little editing on some places. In this case, few nodes in the right corner of the mouth were edited to remove intersecting edges.
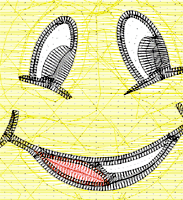
13. Embroidery design is finished. Notice the difference between the the plain yellow fill and the column-style of eyes and mouth. Previously made steps allowed us to create objects with an overlay and appropriate openings (holes) where needed.
One more thing that needs to be checked is sewing order of the objects to minimize the color changes. When making gray, white and red objects, it is possible that newly created vector objects are not sorted properly. Therefore, re-order these objects in the Object Inspector window to minimize the color changes, while leaving black outlines at the very top and yellow fill at the very bottom of the design.
As all objects in our embroidery design are separate areas, we do not need to insert connections between the objects. Trims are automatically added between all objects. In other cases, however, it might be suitable to insert connections between some objects (letters, for example) to reduce the trims.