Navigate
Products
Download
eShop
Upgrade
Overview
Training
Support
Navigate
Products
Download
eShop
Upgrade
About
Training
Support
This tutorial explains how to use the older version of Sfumato Stitch plug-in. Older version of Sfumato Stitch is additional plug-in for Embird. To use it, you must download it (e.g. from Embird File Archive) and install it (run the downloaded file).
Note: A newer version of Sfumato Stitch is now available. The new Sfumato Stitch is integrated in Digitizing Studio plug-in (version 3.0 and above). However, you must pay for it if you want to use it. In other words, the registration fee for Embird or for Digitizing Tools does not cover the registration of Sfumato Stitch.
1 - Run Embird and click "Editor" menu to switch to Editor window.
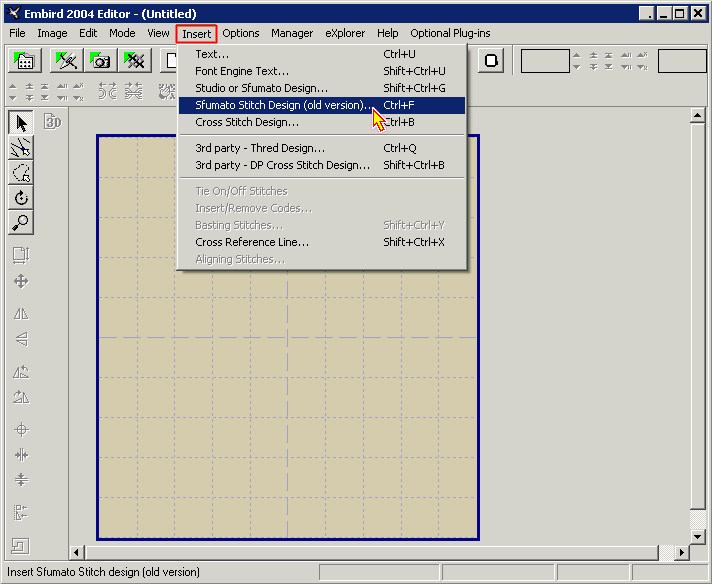
2 - Run older version of Sfumato Stitch plug-in by selecting "Insert -> Sfumato Stitch Design (old version)" command from the main menu (Picture No. 1).
Picture No. 1
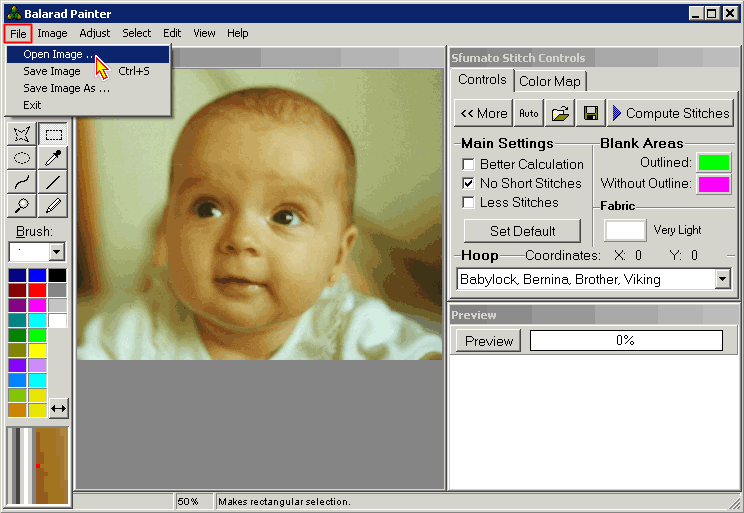
3 - The Sfumato Stitch window will appear on the screen. Select "File -> Open Image" command to open either .bmp or .jpg image (Picture No. 2).
Picture No. 2
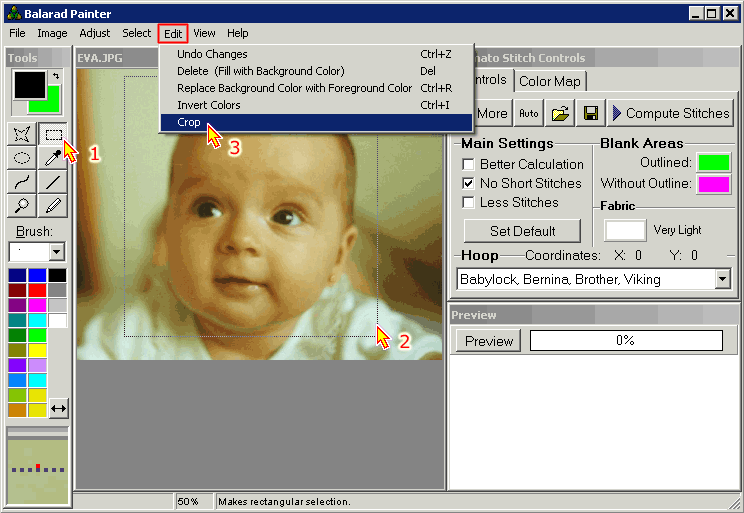
4 - Choose the "Selection Tool" in the toolbar at the left side of the screen (arrow 1 in Picture No. 3). Make the selection which you would like to crop and convert to stitches. To make the selection, move the mouse pointer to the work area to the top left corner of the selection, depress the left mouse button and drag the mouse to the right bottom corner of the selection. Release the left mouse button there (arrow 2 in Picture No. 3) Finally, crop image by choosing "Edit -> Crop" command from the main menu (arrow 3 in Picture No. 3).
Picture No. 3
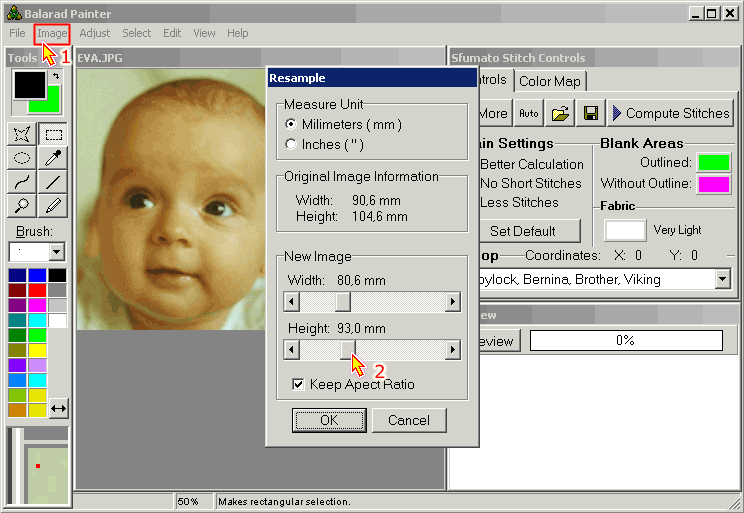
5 - Use "Image -> Resample" command from the main menu to resample the image to its final size (Picture No. 4).
Picture No. 4
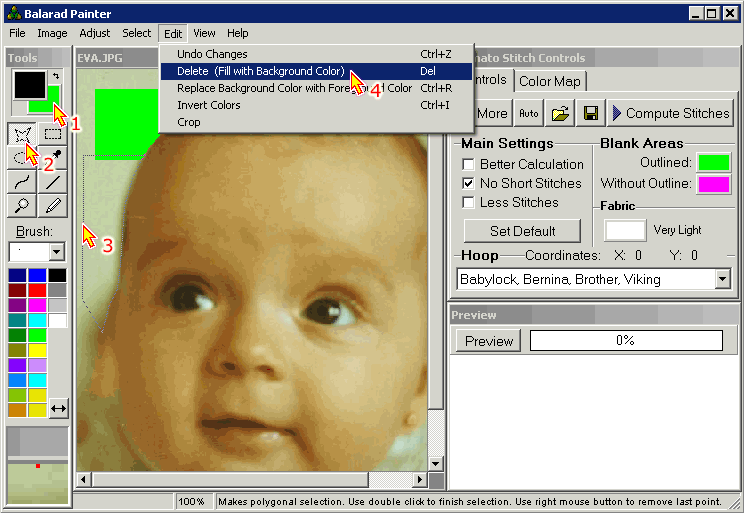
6 - Choose Background Color in Painter Tool Bar (arrow 1 in Picture No. 5). Basic colors (like "Lime green" R=0, G=255, B=0) are preferred.
7 - Fill all areas of image that should not be covered with stitches using the Selection Tool (arrow 2 in Picture No. 5). To select an area, move the mouse pointer to its first point and click the left mouse button, then move mouse pointer to the second point and click the left mouse button again. The first and second point will be connected by line. This way you can draw selection polygon around the area which you want to select. Finally, double click the left mouse button to close the polygon (arrow 3 in Picture No. 5).
8 - Once the area is selected, click "Edit -> Delete (Fill with Background Color)" command from the main menu (arrow 4 in Picture No.5).
Picture No. 5
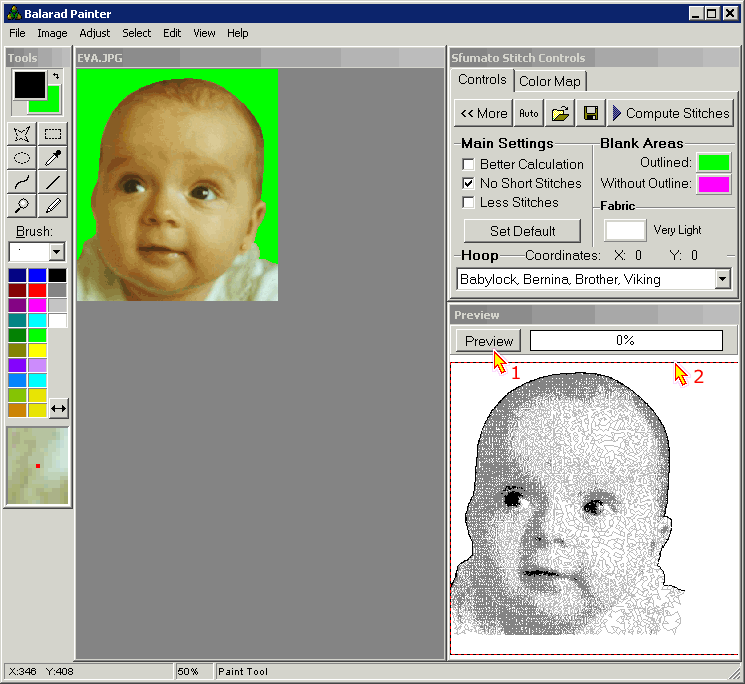
9 - Click the "Preview" button in the Preview window which is located in the right bottom corner of the screen (arrow 1 in Picture No.6). Wait a moment to see the preview of the embroidery design in the Preview window.
10 - Choose the right "Hoop Size" in the Hoop Combo Box which is located above the Preview window. Adjust the position of the design in the hoop (which is shown as red rectangle in Preview window): Depress the right mouse button while the mouse pointer is inside the red rectangle, move the mouse pointer (and the red rectangle) to the new position and finally release the right mouse button.
Picture No. 6
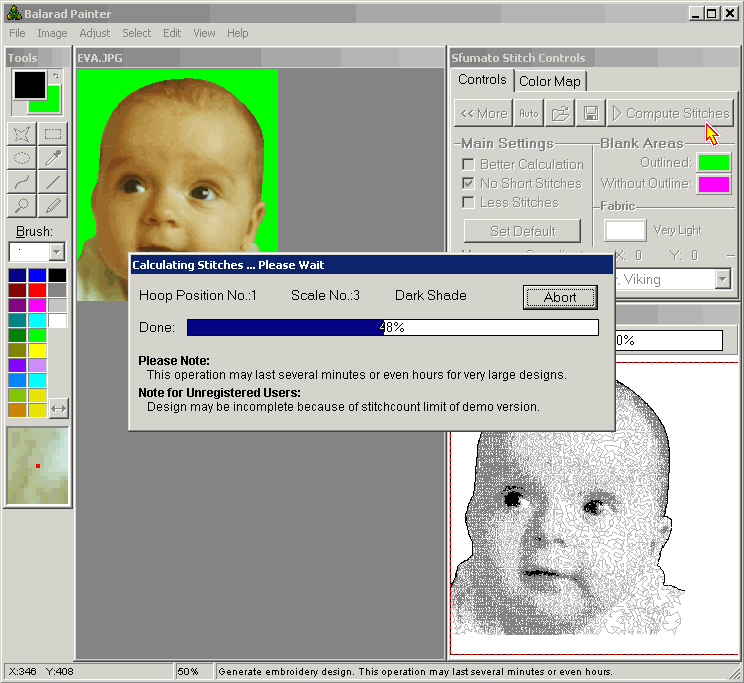
11 - Click the "Compute Stitches" button. Program will start computing the stitches. Calculation of design may last several minutes or even hours for very large designs. When finished, return to Embird Editor - program will ask you whether you want to close the Sfumato session and return to Embird Editor or not.
Picture No. 7
12 - Back in Embird Editor, use the "File -> Save As" command to save the design to a file on your disk. Specify the format and the file name of the new design in the dialog boxes which appear on the screen.
Back to Embird Tutorial Contents
Developed by BALARAD, s.r.o. company since 1997