
Navigate
Products
Download
eShop
Upgrade
Overview
Training
Support

Navigate
Products
Download
eShop
Upgrade
About
Training
Support
Embird Plus v. 7.20 and above can cooperate with DP Cross Stitch Software, release 1.32 and above. This software is developed by the DP Software company and it allows you to create cross stitch designs. More information, a demo, registration, and support for DP Cross Stitch Software are available at http://www.dpsoftware.co.uk
Note: The DP Software company is not affiliated with Embird. There exists also an Embird Cross Stitch plug-in developed by Embird authors - find more information in the Embird Cross Stitch tutorial.
Please read the guide below to find out how to use the DP Cross Stitch Software with Embird. It is assumed that you have downloaded the DP Cross Stitch Software from the website of its developers and successfully installed it on your computer. Before you start using the DP Cross Stitch Software with Embird, please run Embird and check in the "Options -> Plug-ins Paths" menu that the correct path to the XSTITCH.EXE file (the main application file of DP Cross Stitch Software) is specified there in the "Machine Cross Stitch" box.
1 - Run Embird and click the "Editor" menu to switch to the Editor window.
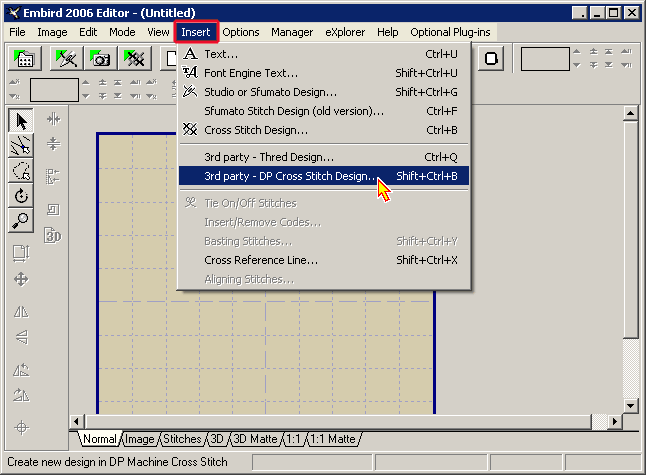
2 - Select the "Insert -> 3rd party - DP Cross Stitch Design" menu (Picture No.1). This command will launch the DP Cross Stitch Software, which will work as a plug-in for Embird.
Picture No. 1
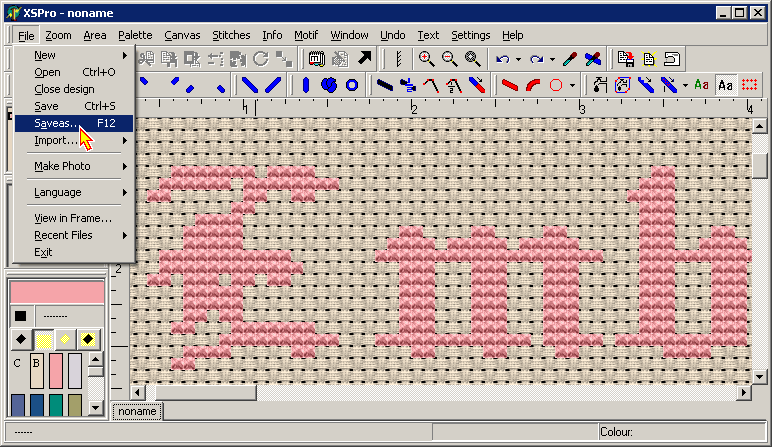
3 - The Embird window will disappear for the time the cross stitch software is running. The main window of DP Cross Stitch Software will appear on the screen (Picture No. 2). Create the cross stitch design using this software. In this example, we have created the pink lettering "Embird".
4 - When you are finished, click the "File -> Save as" command to save the cross stitch project to a file on your hard disk (Picture No. 2).
Picture No. 2
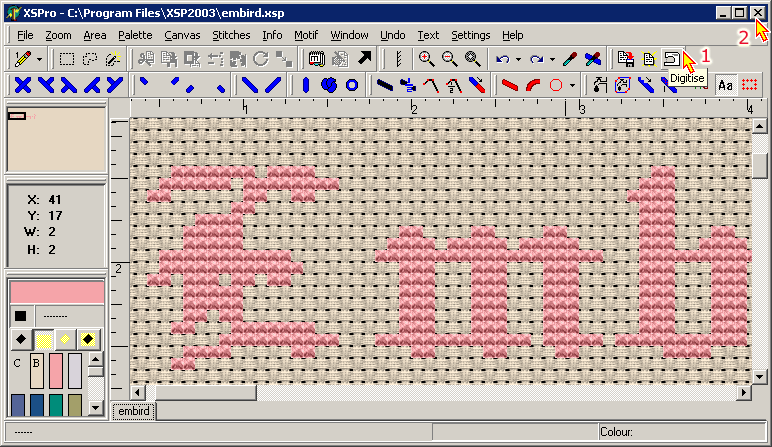
5 - Click the "Digitise" button (arrow 1 in Picture No. 3) to compile your cross stitch project into stitches.
6 - Close the main window of DP Cross Stitch Software (arrow 2 in Picture No. 3) to return to Embird.
Picture No. 3
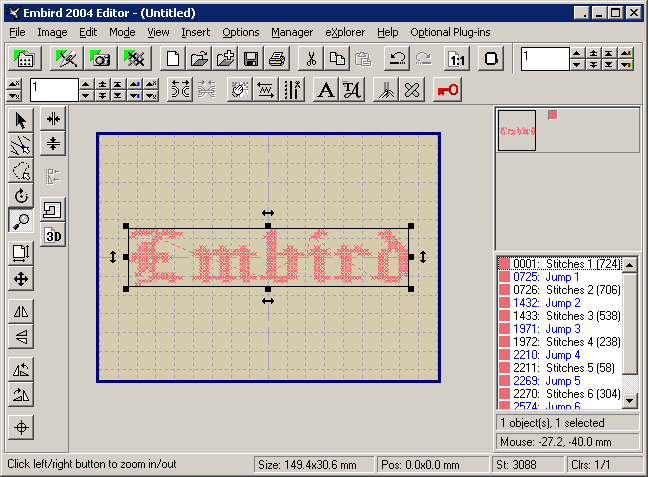
7 - The output from the DP Cross Stitch Software will be launched into the Embird Editor, so that you can edit it, add lettering, or just save it to the hard disk in the target embroidery format (Picture No. 4).
Picture No. 4
8 - Use the "File -> Save As" command to save the design to a file on your disk. Specify the format and the file name of the new design in the dialog boxes which appear on the screen.
Back to Embird Tutorial Contents
Developed by BALARAD, s.r.o. company since 1997