
Navigate
Products
Download
eShop
Upgrade
Overview
Training
Support

Navigate
Products
Download
eShop
Upgrade
About
Training
Support
1 - Run Embird and click the "Editor" menu to switch to the Editor window.
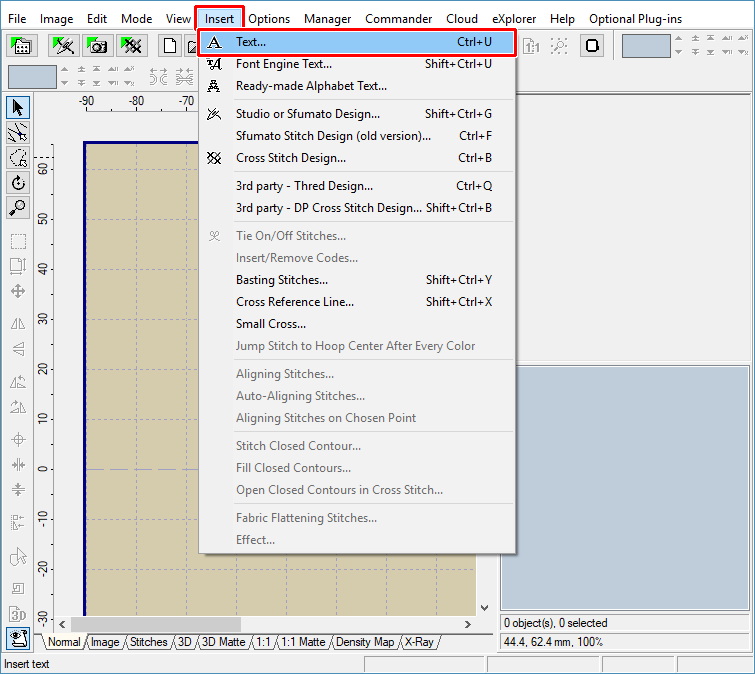
2 - Select the "Insert > Text" menu (Picture No. 1).
1. Select "Insert > Text" menu
3 - The "Insert Text" dialog box will appear on the screen (Picture No. 2). In the "Plug-in" box, you can choose the alphabet which will be used for characters. After choosing the alphabet, you can type your text into the "Text" box at the bottom of the "Insert" tab.
2. Insert Text window - Insert tab
4 - Click the "Layout" tab (1 in Picture No. 3). Notice the panel with settings at the bottom of the preview area (on some computers with lower screen resolution, it might be necessary to scroll the panel using the scroll bar below it). Switch ON the "Envelope" option (2) and select an envelope (3). A rectangle will appear in the preview box, with several sensitive points - black squares. You can move each sensitive point (4) to change the text envelope. Move the mouse pointer to a sensitive point and depress either the left or right mouse button. Then move the mouse pointer to a new location and finally release the mouse button. You will immediately see the new shape of the lettering. You can also choose from pre-defined shapes in the box below the "Envelope" option. There are also other options available - you can choose the type of envelope edge: either "Line" or "Curve". If you want to create a symmetrical envelope, you will find the "Horizontal" and "Vertical" options in the "Symmetry" box very helpful.
3. Change Envelope at Layout tab
5 - Finally, click the "OK" button to create the lettering and insert it into the Editor window.
6 - Use the "File > Save As" command to save the whole design to a file on your disk. Specify the format and the file name of the new design in the dialog boxes which appear on the screen.
Tip: You can create your own shapes, which will be offered in the box with "pre-defined" envelopes located below the "Envelope" check box (e.g., "eye" shape in Picture No. 3). Once you are ready with the new envelope, click on the button with the "floppy disk" icon (Picture No. 4) and save the lettering project into the "PLUGINS" sub-folder of your "User data folder" (which is specified in the "Help > Installed plug-ins" dialog box). Only .LTG files saved into this folder are offered in the "pre-defined" box.
4. Save your own Envelope shape
Back to Embird Tutorial Contents
Developed by BALARAD, s.r.o. company since 1997