
Navigate
Products
Download
eShop
Upgrade
Overview
Training
Support

Navigate
Products
Download
eShop
Upgrade
About
Training
Support
1 - A design is digitized so that the user creates outline (vector) objects either on a blank background or on an image (template).
Studio can import an image in JPG, BMP, PNG, and TIFF formats. Convert the image to one of these file types.
Embird Manager can convert the following image file types: .BMP, .GIF, .JPG, .PCX, .PNG, .PSD, .TGA, .TIF. (Embird Manager-> Image Operations-> Convert Images)
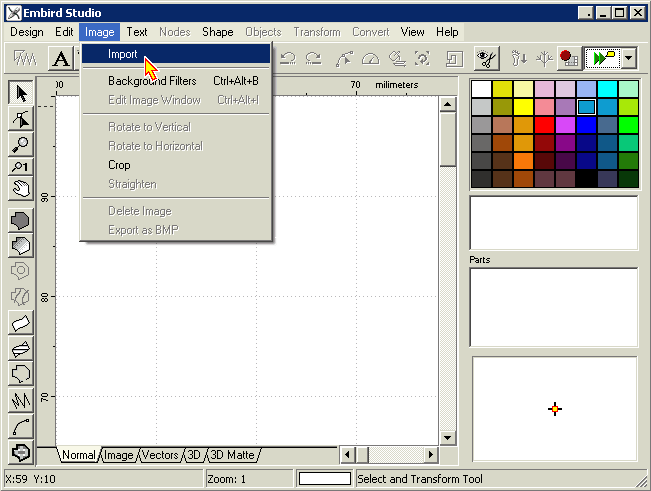
2 - Open Embird Studio. Import the image to Studio by selecting " Image->Import". (Picture No. 1)
Picture No. 1
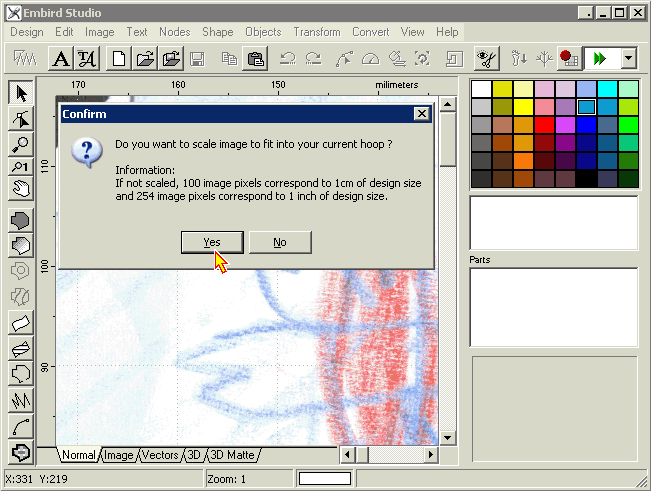
3 - Studio ignores the DPI, resolution, or size set by the graphics program that generated the imported image, instead using this scheme:
100 pixels = 1 cm of design size; 254 pixels = 1 inch. The user may also select 'Scale image to fit current hoop' option to scale the image to the hoop size while importing. (Picture No. 2)
Picture No. 2
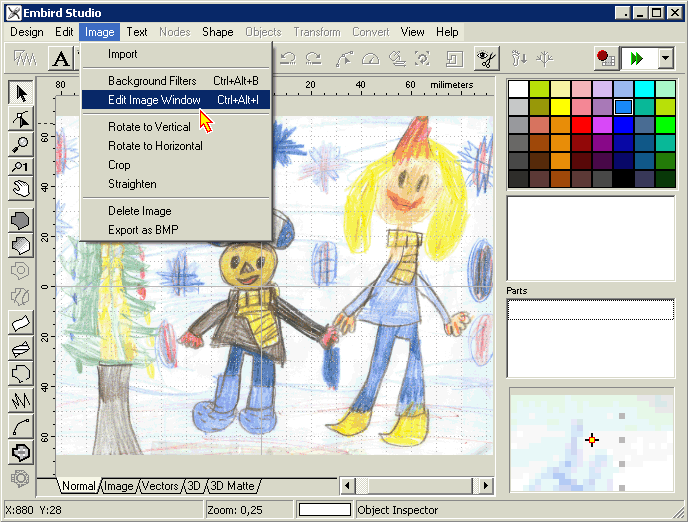
4 - Edit the image. Crop the image, rotate, set size, and add a border around the image. (Picture No. 3)
Picture No. 3
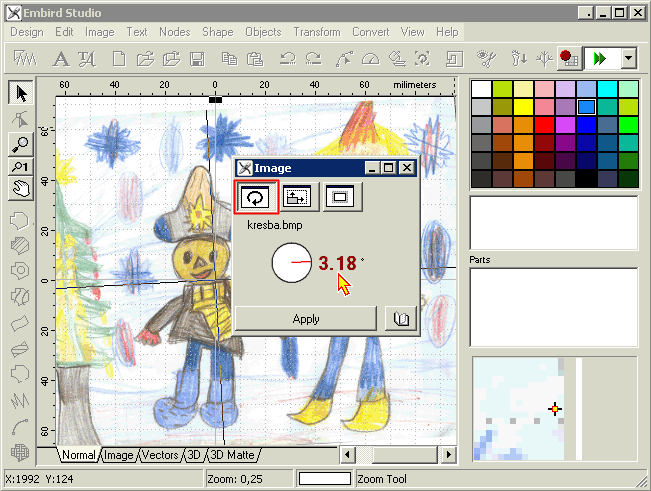
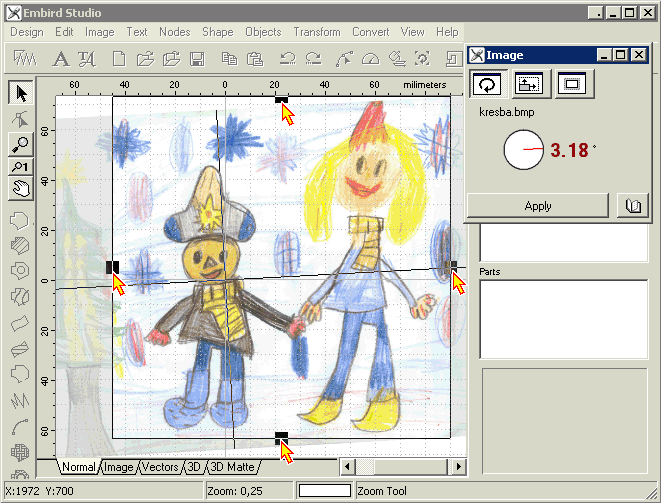
5 - Click on the first icon of the edit image window to rotate the image. Move the red line in the circle with the left mouse button to set the rotation angle or click on the number: the right mouse button allows you to increase the angle value, and the left mouse button allows you to decrease the angle value (Picture No. 4).
Note: You can find the "Edit image window" tutorial when you click on the "Help" button in the window.
Picture No. 4
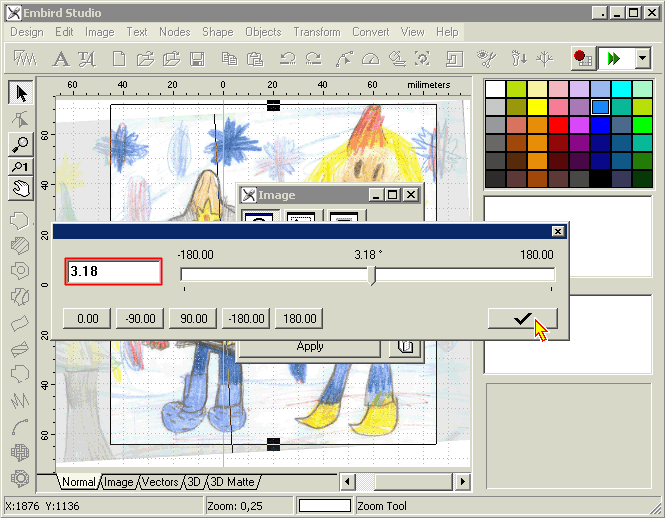
6 - Click with the right mouse button on the circle area to show a dialog box with a slide bar and a box allowing you to set an exact rotation angle value (Picture No. 5).
Picture No. 5
7 - The image is cropped by selecting the working area with crop lines. Crop lines allow you to cut out the area of the image intended for digitizing (the one which will appear on the work area) and discard the unused image parts. Move the crop lines close to the edges of the image area intended for digitizing. Crop lines have a square handle in the middle to allow the user to grab and move the crop line. The area that will be cut off is grayed out (Picture No. 6).
Picture No. 6
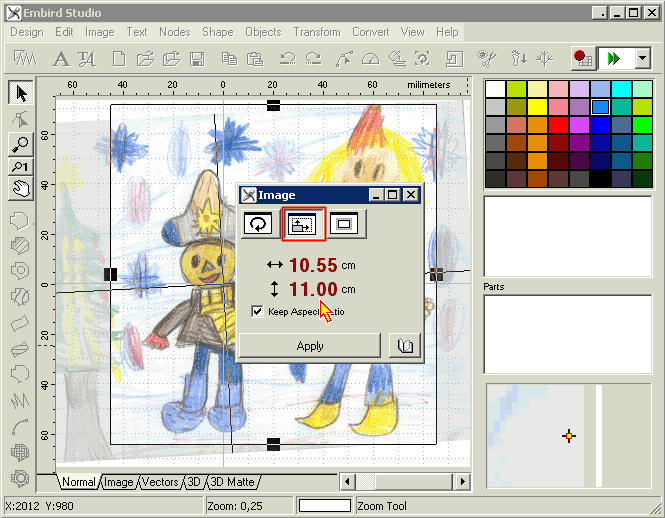
8 - Choose the middle icon in the edit image window to set the size of the selected area. Depress the left mouse button on the width or height value to decrease it or depress the right mouse button to increase the width or height of the image. It is possible to resize the image while keeping the aspect ratio (checked option) or uncheck the box to keep the aspect ratio and change the width and height separately. (Picture No. 7)
(Click with the right mouse button on the width or height arrow to show the slide bar and set the values with the slider. Look at Picture No. 5. You can find the "Edit image window" tutorial when you click on the "Help" button in the window.)
Picture No. 7
8 - A border is an empty area around the image. A border that can be set around the image allows for easier object creation on the image edge (Picture No. 8).
Note: The maximum size of the border is 0.50 cm.
(Click with the right mouse button on the width or height arrow to show the slide bar and set the values with the slider. Look at Picture No. 5. You can find the "Edit image window" tutorial when you click on the "Help" button in the window.)
Picture No. 8

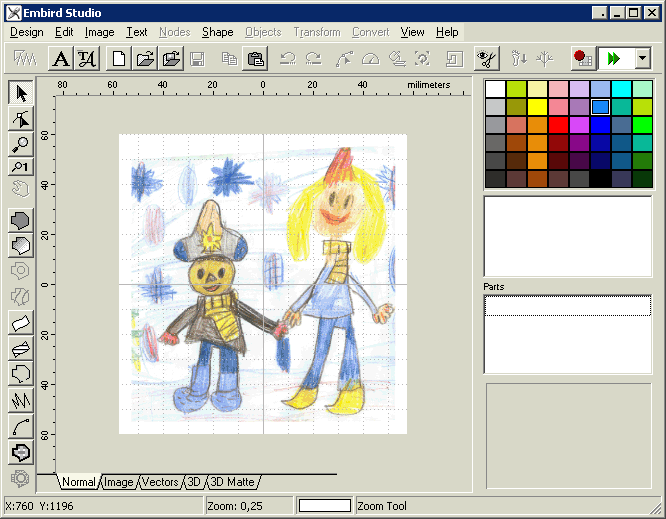
9 - After the above four steps, click Apply to perform the changes. The cropped, rotated, and resized image with a blank border is prepared for digitizing. (Picture No. 9)
Picture No. 9
Back to Embird Tutorial Contents
Developed by BALARAD, s.r.o. company since 1997