Navigate
Products
Download
eShop
Upgrade
Overview
Training
Support
Navigate
Products
Download
eShop
Upgrade
About
Training
Support

Preview table
with user samples.
Samples are used to create fancy outlines. They are aligned along the outline in a continuous formation. Motifs are used in a similar way for fancy fills.
Both samples and motifs should be made so that they allow seamless, continuous connection. Studio contains built-in editor of outline samples and fill motifs that facilitates this task.
User can create up to five outline samples and up to five fill motifs that are saved with the design.
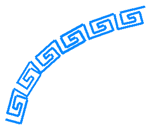
Sample aligned along the outline.
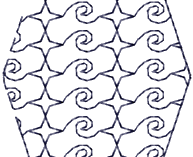
2 motifs used as fill.
Samples and motifs are small formations of stitches. They are made from single stitch by inserting nodes (needle points) between the first and last point and moving them on the work area. Initial form of sample is single stitch. Preserving of first (left) and last (right) points ensures seamless connection of samples.
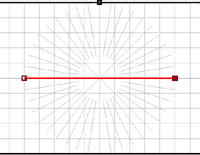
New sample - initial stitch.
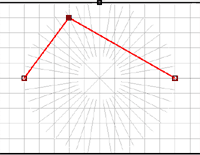
A node inserted between first and last point.
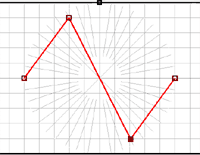
Another node inserted. Sample is finished.
![]()
Continuous formation
of samples projected along the line.
Both samples and motifs are used by Studio so that they are projected into virtual windows along the outline or inside the fill. The size of these windows is defined by Min. Length, Width and Height parameters.
The width/height ratio of sample in the work area does not have to be identical to Length/Width ratio given by user. When Studio is projecting sample or motif into virtual window, the length of sample is adjusted to place the first and last point exactly onto the window beginning and end. User can decide which method will be used for adjustment:
1. Deform - whole sample/motif is deformed (stretched) to fit into window.
2. Add Jump - sample/motif is not deformed, but jump stitch is added to its end.
3. Add Stitch - sample/motif is not deformed, but running stitch is added to its end.
All fill motifs and most of outline samples use Deform method. Special outlines like "Candlewick" that should be composed of some not deformed objects connected by jumps or running stitches use Add Jump or Add Stitch methods.
To examine predefined Studio motifs and samples Open sample or motif from PATTERNS folder.
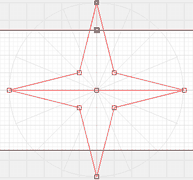
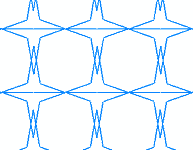
Adjustable gray area on top and bottom of work area allows user to change the width/height ratio of the work area. Stitches may stick into gray area. If they do so, it means that sample/motif will stick out of windows along the outline or inside of fill. Use this approach if you want motifs to overlap each other (picture at right).
Min. Length. applies only to outline samples. It defines the smallest window length in curves.
Shift applies only to fill motifs. If defines the mutual shift of motif rows when projected to a fill.
Length is length of sample or motif.
Width is width of sample or motif.
Simulate. Click this button to run slow simulation of how sample/motif stitches will be sewn.
Save. Click this button to save sample or motif to the disc in order to transfer it to other design.
Open. Click this button to load sample or motif saved previously from other design.
Clear. Click this button to reset selected sample or motif.
Import image into background. Click this button to open an image and use it as the template when drawing the sample or motif.