
Navigate
Products
Download
eShop
Upgrade
Overview
Training
Support

Navigate
Products
Download
eShop
Upgrade
About
Training
Support
The Edit Image Window is accessible through main menu under Image / Edit Image Window. Controls in this window allow user to rotate and resize image and add border to image for easier digitizing near edges of image. While Edit Image window is visible, four small rectangles appear in the work area to allow user to crop the image.
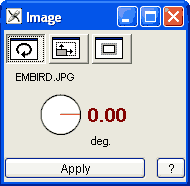
After import of image, go to Edit Image window and make adjustments in following order:
Rotate image first. Usually, the scanned image is not perfectly horizontal or vertical. Press left or right mouse button on the red angle parameter or click the rotate icon to adjust the angle.
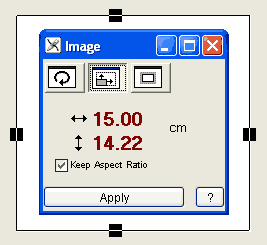
Second step is setting of crop lines. Press left mouse button on any of four small rectangles and drag them to a new position. Area outside of selection will be cropped. Do not leave empty space around the subject. Set the crop lines closely to the subject.
Third step is to set desired size of image and at the same time the size of design.
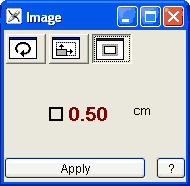
The fourth step is to set width of border (empty space for easier work near edges) around the image. You should not need to change this parameter.
After above four steps, click Apply to perform changes.
Note: use main menu/Image commands Rotate to Vertical and Rotate to Horizontal for precise rotation of images that contain straight vertical or horizontal lines.