
Navigate
Products
Download
eShop
Upgrade
About
Training
Support

Navigate
Products
Download
eShop
Upgrade
About
Training
Support
Digitizing in Embird Studio means drawing of objects, which are filled with stitches according to parameters set individually for each object. This approach was chosen because embroidery design usually contains areas of the same type of stitches - plain fill (2), satin stitches (3), outline (1), etc. Such areas can be digitized as a separate objects of respective type and color. Program fills them with appropriate stitch type and user does not need to care about each individual stitch.
Stitches order within object is controlled by program, with a single exception: object's beginning and end point, which are defined by user. Stitching starts at beginning point and stops at the end point of the object. Definition of these points is important for correct connection to previous and next object.
Objects are listed in Object Inspector list (right side picture). They are listed in the actual sewing order from top to bottom.
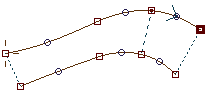
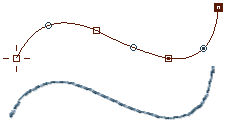
Objects have vector (curve or straight line) edges, which means that they can be resized without loss of quality. Edges are defined by points called nodes. Straight line edge has two nodes - start and end node. Curves in Studio have three nodes - start, middle and end point. Node in the middle of curve defines arch of the curve.
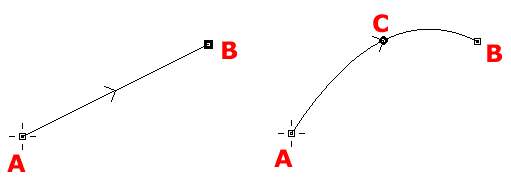
Straight line (left) is defined by 2 points. Curve (right) is defined by 3 points.
Object usually contains several line and/or curve elements.
Studio uses these types of objects:
Each type has specific stitches layout (described below) and adjustable parameters like density, angle, etc. (see Parameters chapter).
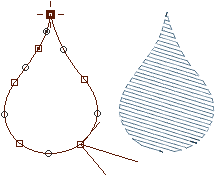
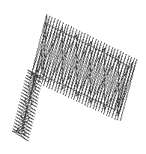
The edge of a fill object is composed of lines and curves. Small rectangles are end points of lines and curves. Small circles are middle points of curves. The cross at the top is beginning of the edge. Diagonal lines at the bottom indicates the place of last fill stitch and angles of cover stitches (longest line) and zig-zag underlays (short and medium length line). Small cross in the object is the 'Focus point' for effects like Circular fill.
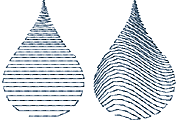
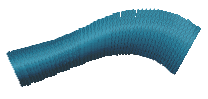
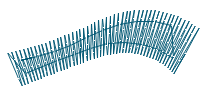
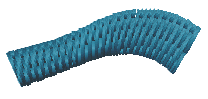
Studio automatically generates edge underlay and two zig-zag underlays as well as overlays and connections. Fill object can contain openings. User can adjust various parameters of Fill object, including stitch density at beginning and end of object and effects like the wave, contour or circular fill. Fill objects may be filled also with automatic column (satin) stitch.
Fill object may be followed with Carving object.
Plain fill (left) and automatic column fill (right)
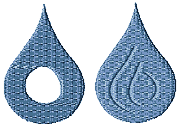
Fill object with opening (left) and carving lines (right).
Single fill object can have multiple openings and/or carvings
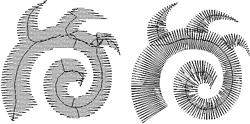
Fill witch circular stitches and
gradient,
contour fill with gradient
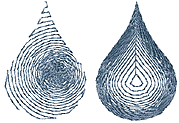
Fill witch circular stitches and gradient,
contour fill with gradient
Direction of stitches in automatic column fill can be controlled to some degree with direction lines.
Most common error message: "Compilation Failed. The sequence is probably not correct. Adjust sequence outlines."
Solutions:1. Do not use too many nodes. The curves allow you to create smooth edges even with small number of nodes.
2. Make sure that all edge element are correctly drawn and that middle points of curves are placed correctly. No edge element should cross other elements.
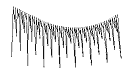
Sfumato objects are used for creation of photo-like embroidery designs. Sfumato object is drawn exactly like the Fill object, but the stitches inside of object are generated in other way. Thread creates meanders of various size to approximate the picture/photo under object.
Sfumato is an optional part of the Studio. It is included in the installation file of the Studio (no separate download needed), but it must be purchased and registered separately.
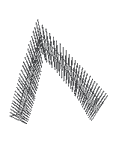
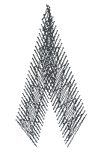
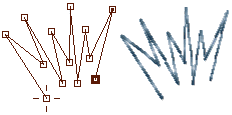
Satin stitch object is called column in the Studio. Column is composed of two edges. Each edge can have different number of parts (lines and curves). Dashed line indicated the End of Segment inserted by user. Segments ends define direction of stitches. Beginning and end of Column are automatically Segment Ends. Program generates small gap at beginning and end of Column to prevent stitches bulging.

Too long cover stitches are replaced by jump stitches ended with short running stitch. Program generates center walk, edge and zig-zag underlays and it also automatically shorts stitches in curved parts. Too sharp corners of Column object are automatically replaced by roof, folded or split corner.
Column object may be followed with Carving object.
Most common error message: "Unable to compile so twisted object. Please insert some segment end into object or adjust edges." Solution:
1. Do not use too many nodes. The curves allow you to create smooth edges even with small number of nodes.
2. Make sure that two sides of column do not cross each other.
3. Use Segment Ends inside of column now and then to define direction of stitches. When making circle or rectangle border with column object, there should be about 4 or more segments inside of column.
Column with Pattern is the same object as Column, but user can define also the pattern, according to which stitches are split. User can define also her/his own patterns.
Both Column and Column with Pattern can be used with Envelope.
Column with Pattern object may be followed with Carving object.
Objects that do not touch each other are automatically connected by jump stitches, when compiling the finished design. If you do not want jump stitch between objects, use Connection Object to make running stitches path between objects.
Manual Stitches are composed of series of lines. Use them to produce fine details.
Outline is composed of one edge that may or may not be closed. User can use various stitch samples for the outline. Typically, this object is used for running stitch outlines added on top of fill or column. Outline may be turned to sketch, satin stitches, border or to applique and vice versa.

Applique Object is similar to Column object, but it must be closed. It serves for stitching down the piece of fabric instead of filling the area with stitches. Applique Object automatically generates marking, tack-down and cover stitches. Tack-down stitches have separate color in order to stop machine and allow user to cut off the fabric.
Applique can also have openings, which are another applique objects inside. Marking stitches, tack-down and cover stitches of main applique and its openings are automatically arranged so that they sew all at once: all marking stitches first, all tack-down stitches next, and all cover stitches at end.
If you need to work with individual layers of Applique object, use main menu > Convert > Split Applique into Layers command. Result is separate marking stitches (outline), tack-down (column) and cover stitches (column) objects.